

How I Use Survey View to Review, Rate, and Cull My Photos in Lightroom
- Michael Rung

- Jun 28, 2025
- 6 min read
Updated: Aug 14, 2025
Are you looking to speed up your photo culling and rating process in Lightroom Classic? In this tutorial, I’ll walk you through my personal workflow, focusing on the powerful but often overlooked Survey View feature. Whether you’re new to Lightroom Classic or a seasoned user, these steps will help you make faster, more confident decisions about which images to keep and edit.
To see my workflow in action, be sure to watch my related video!
Getting Started with Lightroom Classic
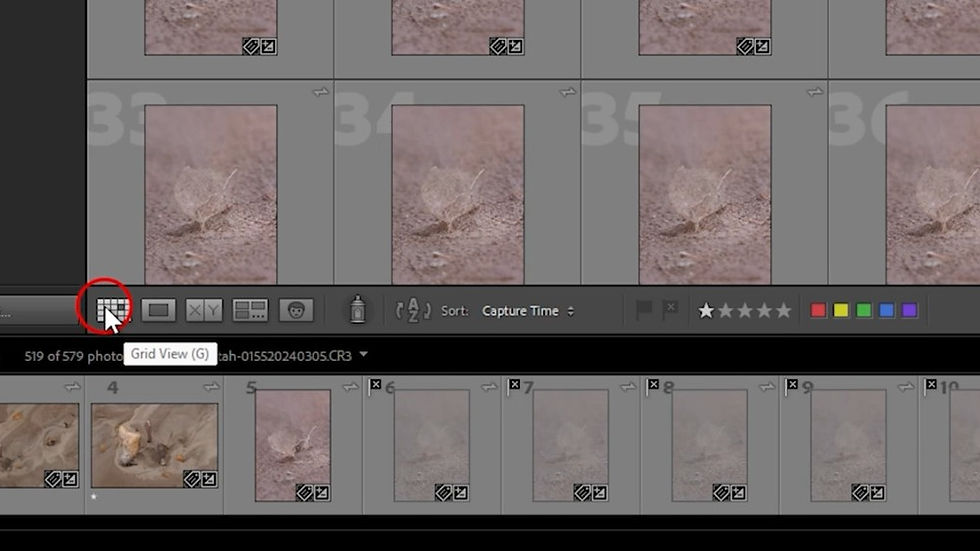
Before diving into the Survey View feature, let’s ensure you begin with the correct settings. When you open Lightroom Classic, make sure you are in the Library Module and Grid View.
Tip: You can always return to Grid View by pressing the G key.

Understanding Different Views in Lightroom Classic
Lightroom Classic offers several ways to view your images. Understanding these views will make your workflow smoother:
Grid View: See all your images as thumbnails.
Loupe View: Double-click an image to see a larger, single-image view.
Compare View: Compare two images side by side.
Survey View: Compare multiple images at once (the focus of this tutorial).


Selecting Images to Open in Survey View
To effectively use Survey View, start by selecting images you wish to compare. While in Grid View, or by using the filmstrip at the bottom of the Library module, select a group of similar images (e.g., variations of the same scene or composition).
Hold Ctrl (Windows) or Cmd (Mac) and click to select multiple images.
Press the N key to enter Survey View after you've made your selection.

Using Survey View to Compare and Cull Photos
Once you've entered Survey View, you will see all your selected images as thumbnails. Keep in mind that the more images you select, the smaller the thumbnails will be. It is a good idea to limit your selections for effective culling.

To make the best use of your workspace, collapse side and top panels for more viewing space: Shift + Tab (or click on the small arrows near each panel).

If you find that one of the selected photos doesn't deserve a rating, you can easily remove it from the Survey View selection. Hover over the thumbnail and click on the X icon in the lower left corner. Remember, this action only removes the image from the current selection; it does not delete it from your Lightroom Classic catalog!

After you've removed unwanted images, start your first pass of selecting candidates for editing. Apply one star to any photo that you believe has potential. For more information on my rating process, check out my Rating and Color Label tutorial on YouTube.
Instead of using the icons to take actions, click on any thumbnail to make it your primary selection. This image will have a thin black border applied. From there, you can use standard keyboard shortcuts for additional actions.
Apply Pick flag: Press the P key
Apply a Reject flag: Press the X key
Apply a rating: Use the 1-5 number keys

If you want a larger version of a single image while in Survey View, simply hit the Space Bar to switch to Loupe View. You can zoom in and out to examine details like sharpness. To return to Survey View, press the N key.

If you need to compare the sharpness or quality of two images side-by-side, use Compare View. You can watch a video walkthrough of the Compare View on Patreon for more insights.
Repeating the Process for Other Groups of Images
Once you've rated the initial group of images with one star, return to Grid View (G key) and repeat the process for other groups. After finishing, filter and repeat as described in the next section.
Use Survey View to compare, cull, and rate each group.
Filter for higher star ratings for your next pass (e.g., 2 stars and above).
Filtering Your Images by Rating in Lightroom Classic
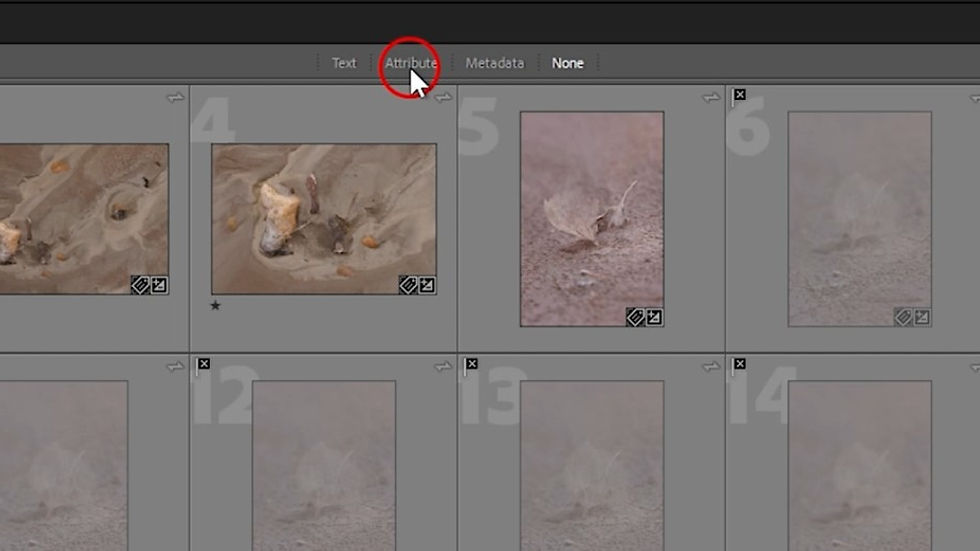
After you have applied your one-star ratings, filter the collection. This allows you to only see 1-star images in both Grid View and the filmstrip along the bottom.
Use the Attribute panel or a custom filter to show only images rated 1 star or above. My personal workflow involves repeating the rating process until I have a set of 3-star selections.

Bonus Tip: Use Lights Out Mode to Focus
While working in Lightroom Classic, I often use the Lights Out mode to focus entirely on the images. This mode removes distracting interface elements. Watch my quick video on Lights Out mode to see it in action and learn how to customize it to fit your needs.

Finalizing Your Selections for Photos to Edit
After you’ve gone through your photos with Survey View, ratings, and filters:
Open the Develop Module.
Filter for your highest-rated images (e.g., 3 stars).
Begin editing!
It's important to note that just because an image has a 3-star rating, I don't always edit it. I may end up with multiple variations of the same scene in my final selection. Sometimes, I need to begin the editing process to make the final decision.
At the end of the day, I aim to keep my rating and culling process swift. The goal of using Survey View is to maintain an efficient workflow; there’s no reason to agonize over images if you're unsure.
Pro Tips
Don’t hesitate to keep images rated 1 or 2 stars: You might recognize their value later, and storage is inexpensive. To support this, I just released a new collection of work, consisting of over 70 photos from my archives. Most were images I initially passed over.
Survey View is non-destructive: As mentioned, removing an image from the selection does not delete it.
Use color labels and stacks for more effective organization. This method is especially useful for focus stacks, exposure stacks, and panorama shots that need merging. Watch my Ratings & Color Labels video for more information, and learn about stacking in my Photo Stacks video.
Conclusion
Survey View in Lightroom Classic is a game-changer for anyone looking to streamline their photo selection process. By following these techniques, you will spend less time culling and more time editing your best shots.
Have questions or want to see more tutorials? Let me know in the comments! And a special thanks to my Patreon supporters for making content like this possible.

Support My Work
I've been pursuing my passion for photography while producing educational resources and other content for several years now. This journey requires time, patience, and monetary investment. Without my supporters, none of this would be possible. Every contribution, no matter how small, allows me to create new work and share my love for the natural world.
Become a member of my Patreon to benefit from several perks, including ad-free videos, early access to my content, exclusive material, discounts, and even free prints and limited-edition folios.

Join the Community
Sign up for a free site membership to leave comments under your own name. You’ll also receive notifications when I reply to your comments or like them. Enjoy a special welcome offer towards your next order of my open-edition fine art prints.


Comments